Troubleshoot Instance Creation
Creating an instance may take some time and effort, but we are here to help!
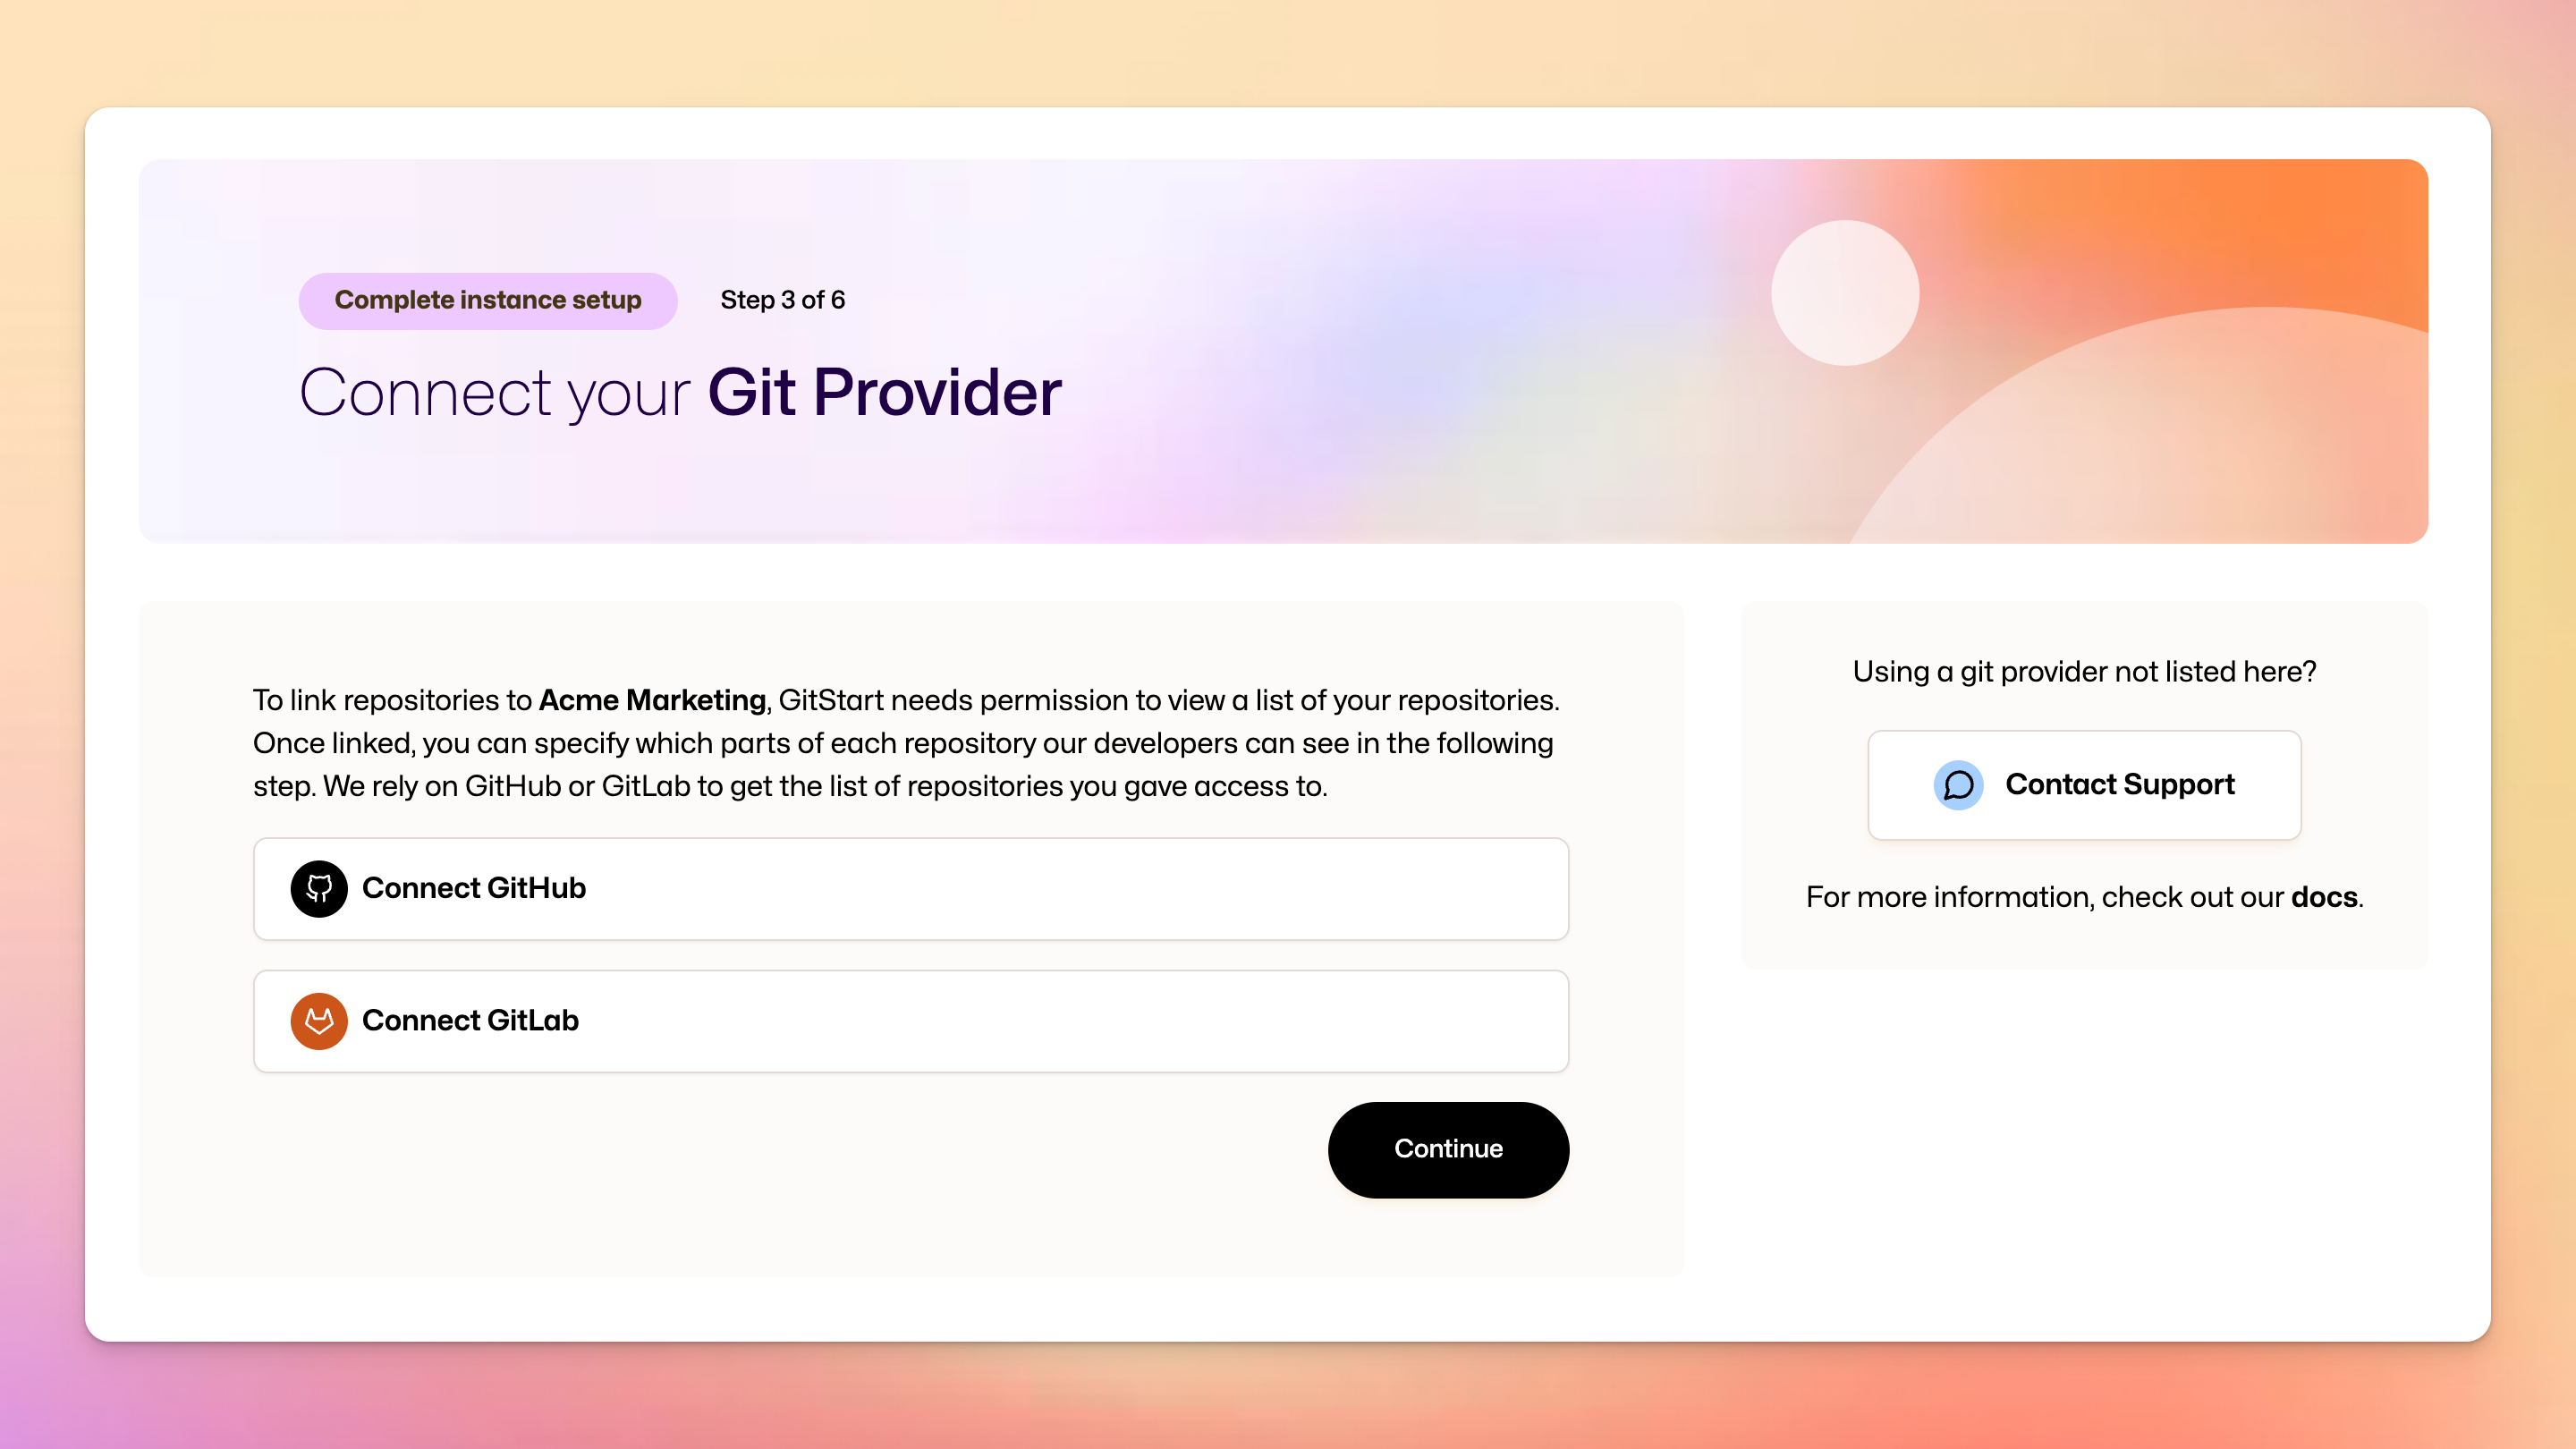
Step: Connect your Git Provider
I installed the GitHub App/linked the GitLab Bot for another instance, do I need to do it again for a new instance?
Scenario: You have created an instance before and you would like to create a new instance, and you are prompted with the screen to “Connect your Git Provider”.
Answer: no, you do not have to do it again. All you have to do is to install the GitStart GitHub App to the new repositories that you want us to work on, or add the repositories to the GitLab Group that the bot account is a member of. Once done, you should see the repositories in the next “Select Repositories” step.
Step: Select Repositories
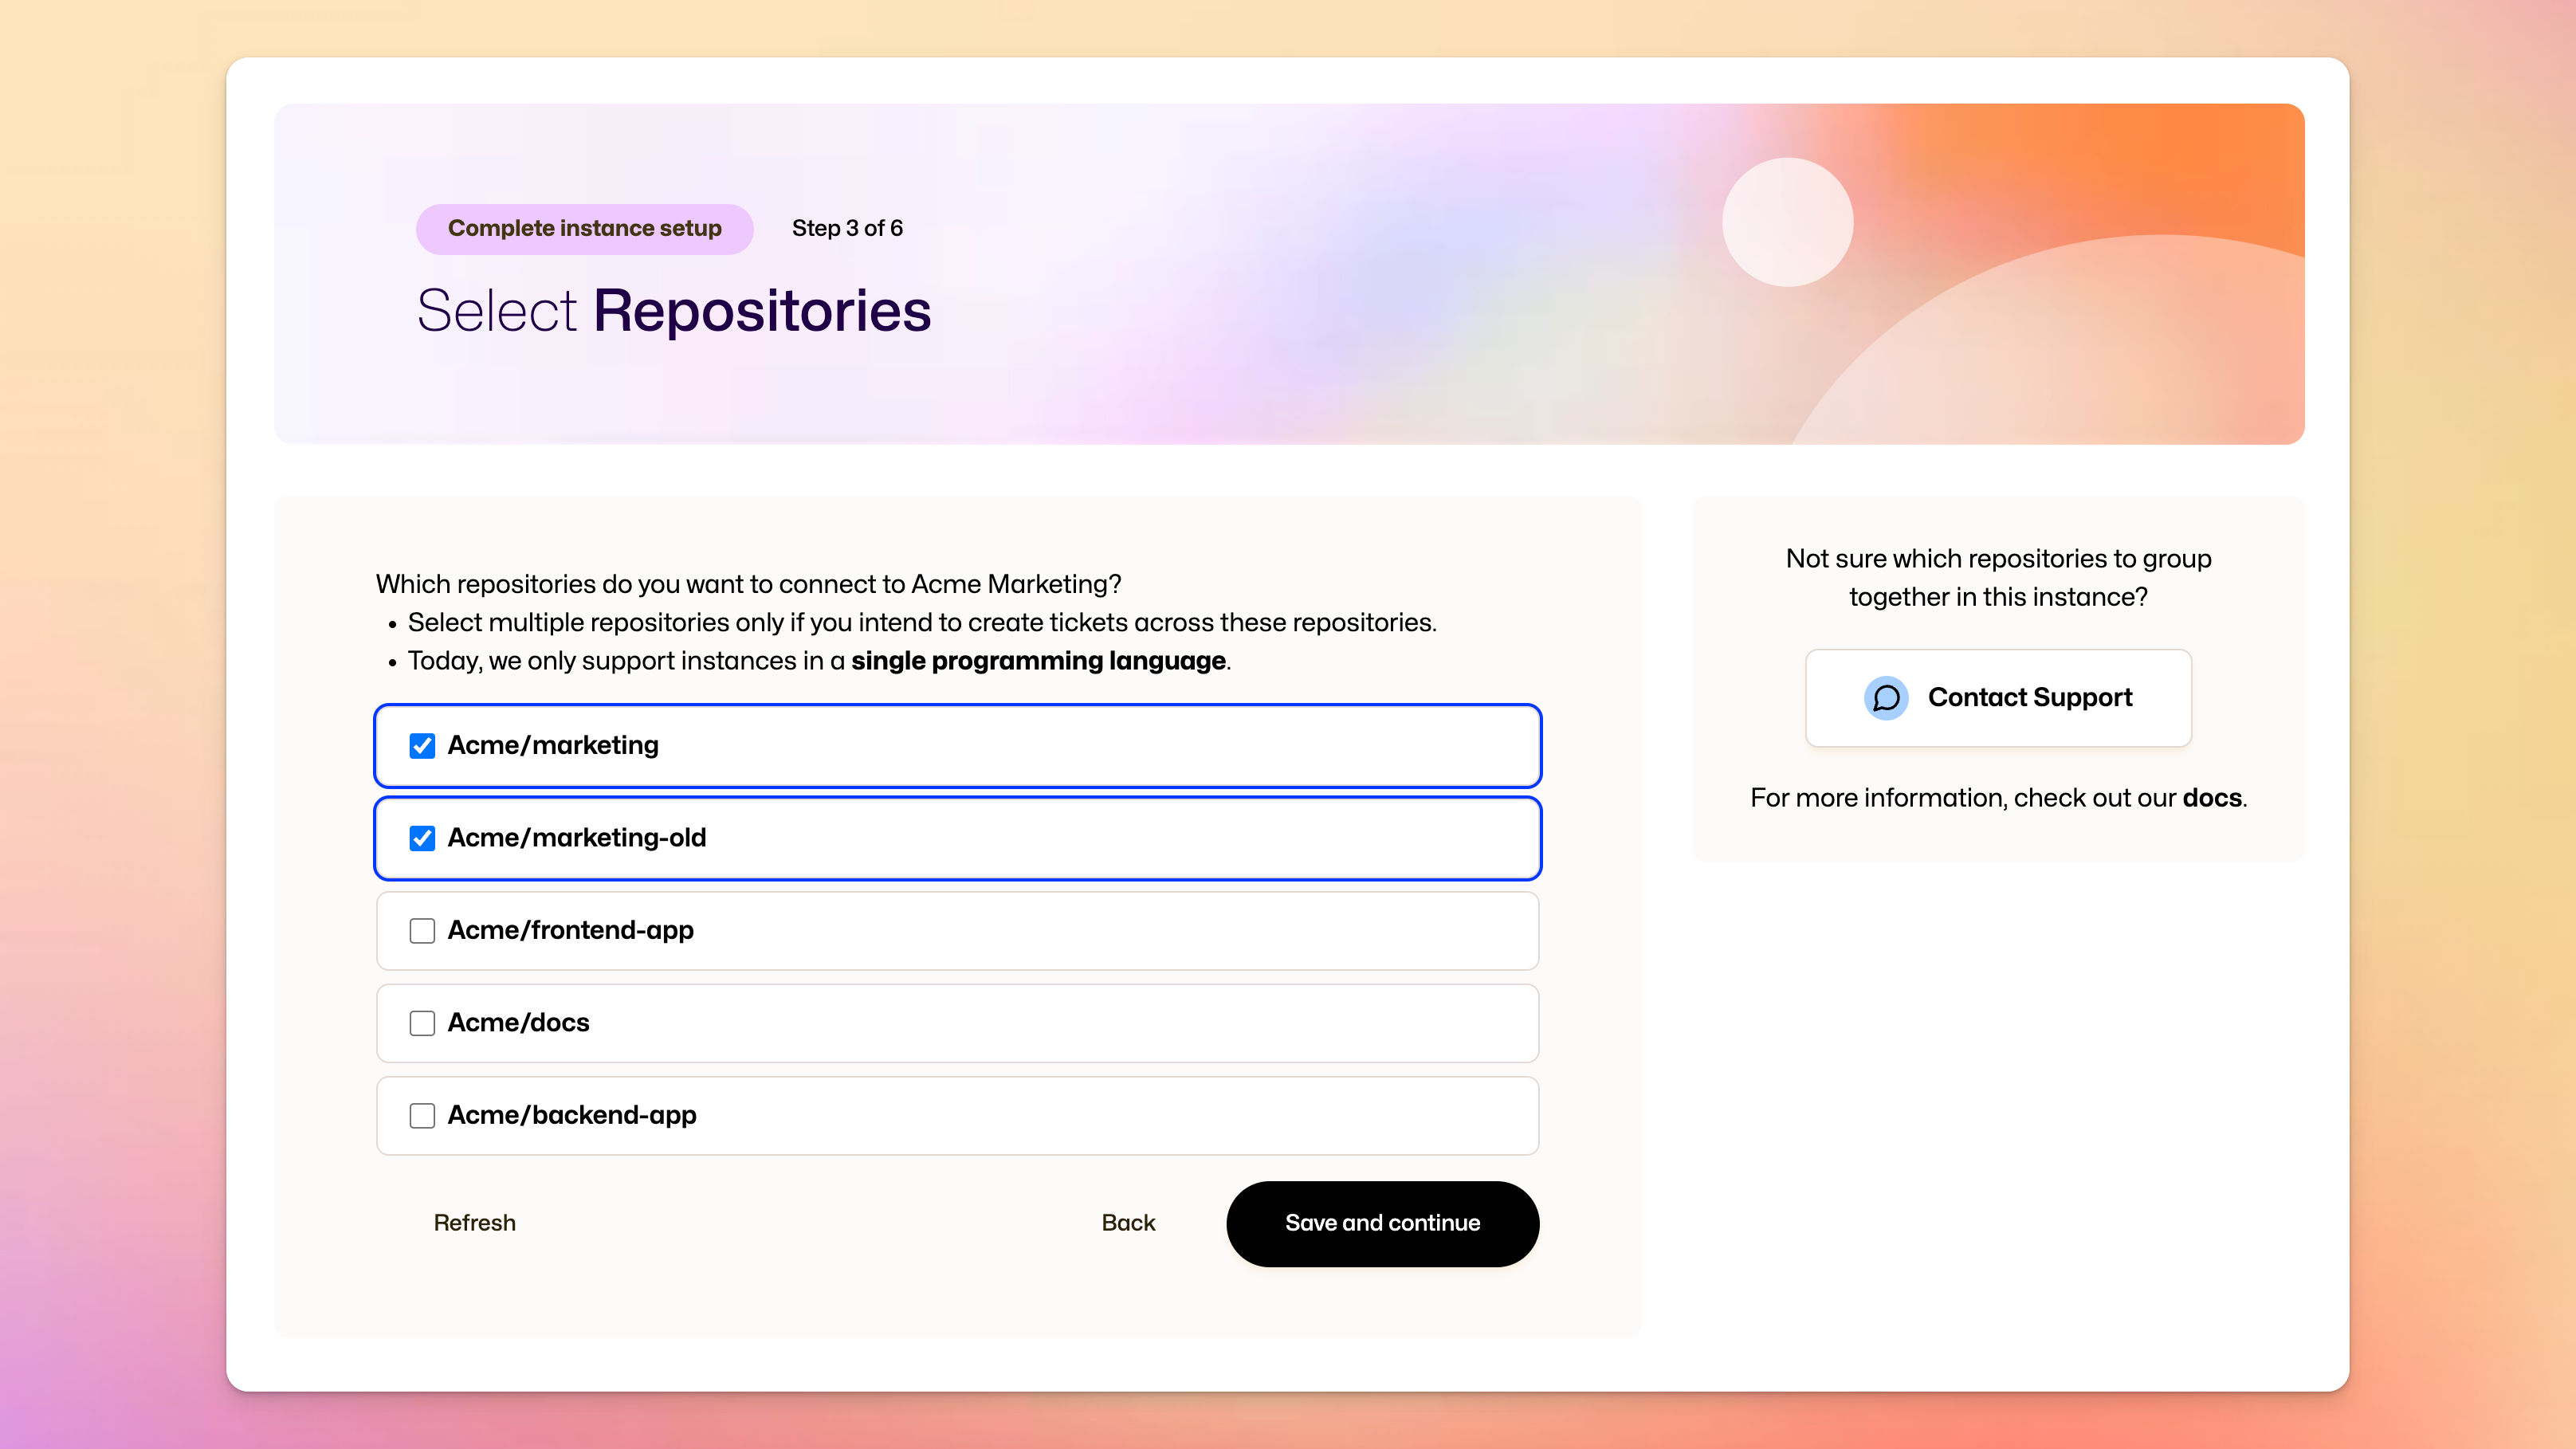
Can I select multiple repositories?
Yes, we do support connecting multiple repositories per instance. However, we require repositories in an instance to be in a single programming language.
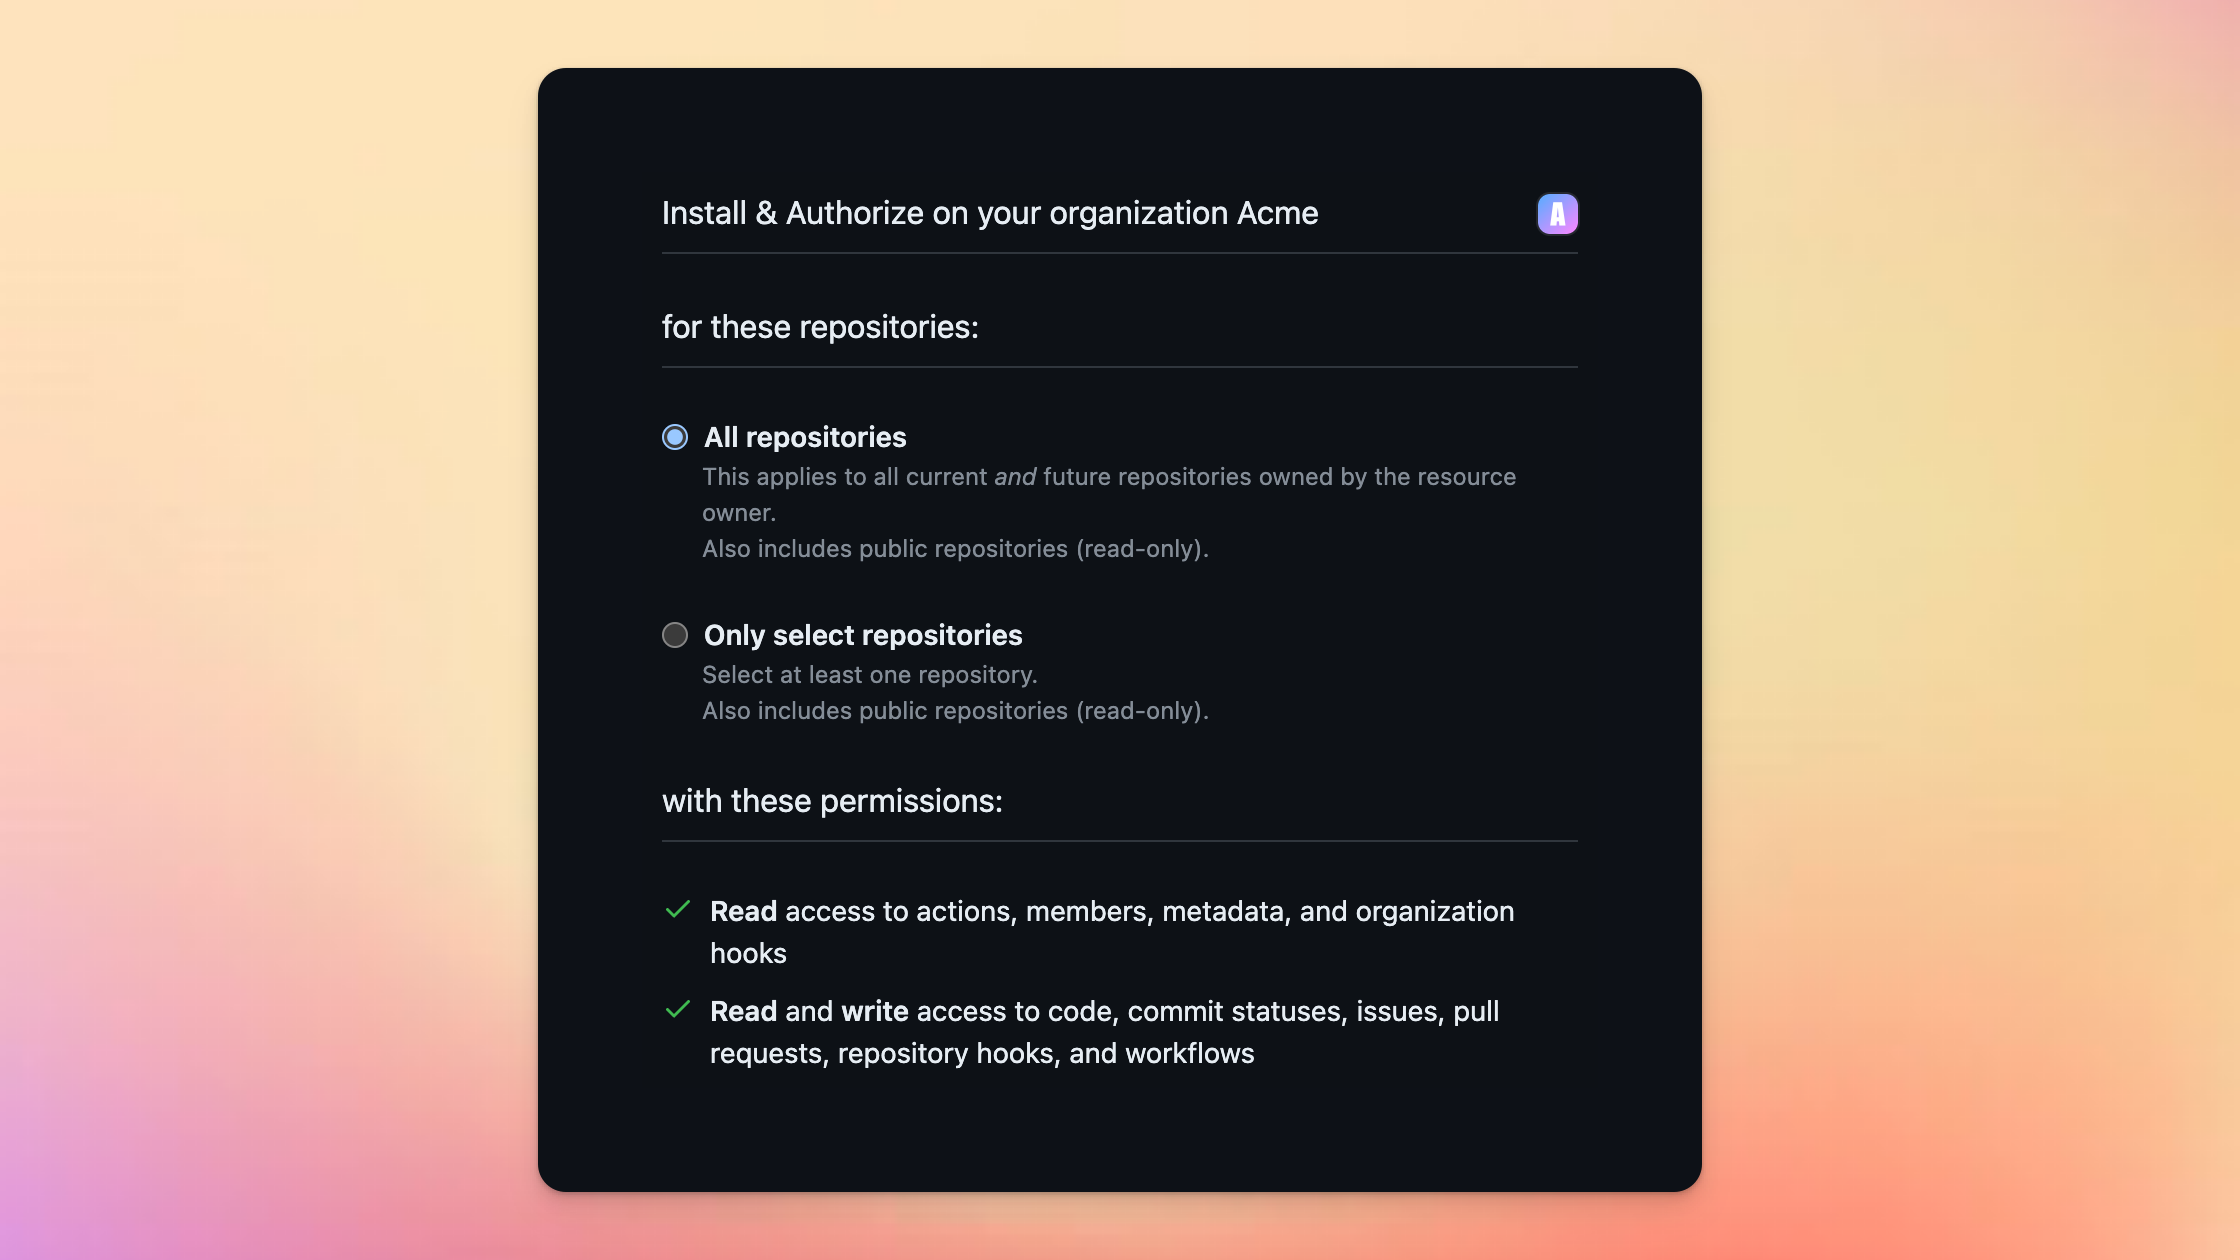
I cannot find my GitHub repository
Scenario: You have installed the GitStart GitHub App to your organization, but you are unable to find the selected repositories in the “Connect repositories” list.
First, make sure the app is installed and authorized. Only organization owners are allowed to install GitHub Apps in an organization; make sure the App is installed and authorized by the organization owner. You can check it in the GitHub organization settings page → GitHub Apps list.
Second, make sure the GitHub App has access to the repositories. You can check it in the GitHub organization settings page → GitHub Apps list → GitStart App → Configure and make sure either “All repositories” is selected or the repository you wanted is in the list of “Only select repositories”.
I cannot find my GitLab repository
Scenario: You have connected the GitLab bot account to our system, and you are sure that the bot account has access to the repository, but you are not able to find it in the “Connect repositories” list.
Solution: check if the repository is in a GitLab Group that the bot account is a part of. Our GitLab integration using bot account only works with GitLab Groups, and it only fetches repositories that are in the groups that the account is part of. Try moving the GitLab repository into a user group, e.g. a group that specifically share repositories with GitStart, and add the bot account as a member of that group.
You might find the following tutorials from GitLab helpful:
The reason why our integration fetches groups first and only fetches repositories that are in the groups is because to limit the number of the repositories returned. This was designed with gitlab.com in mind; simply listing repositories with the GitLab API would include all public repositories. Creating groups and share that with GitStart encourages the least privilege principle, only giving GitStart access to what’s needed.
Step: Slice your Repositories
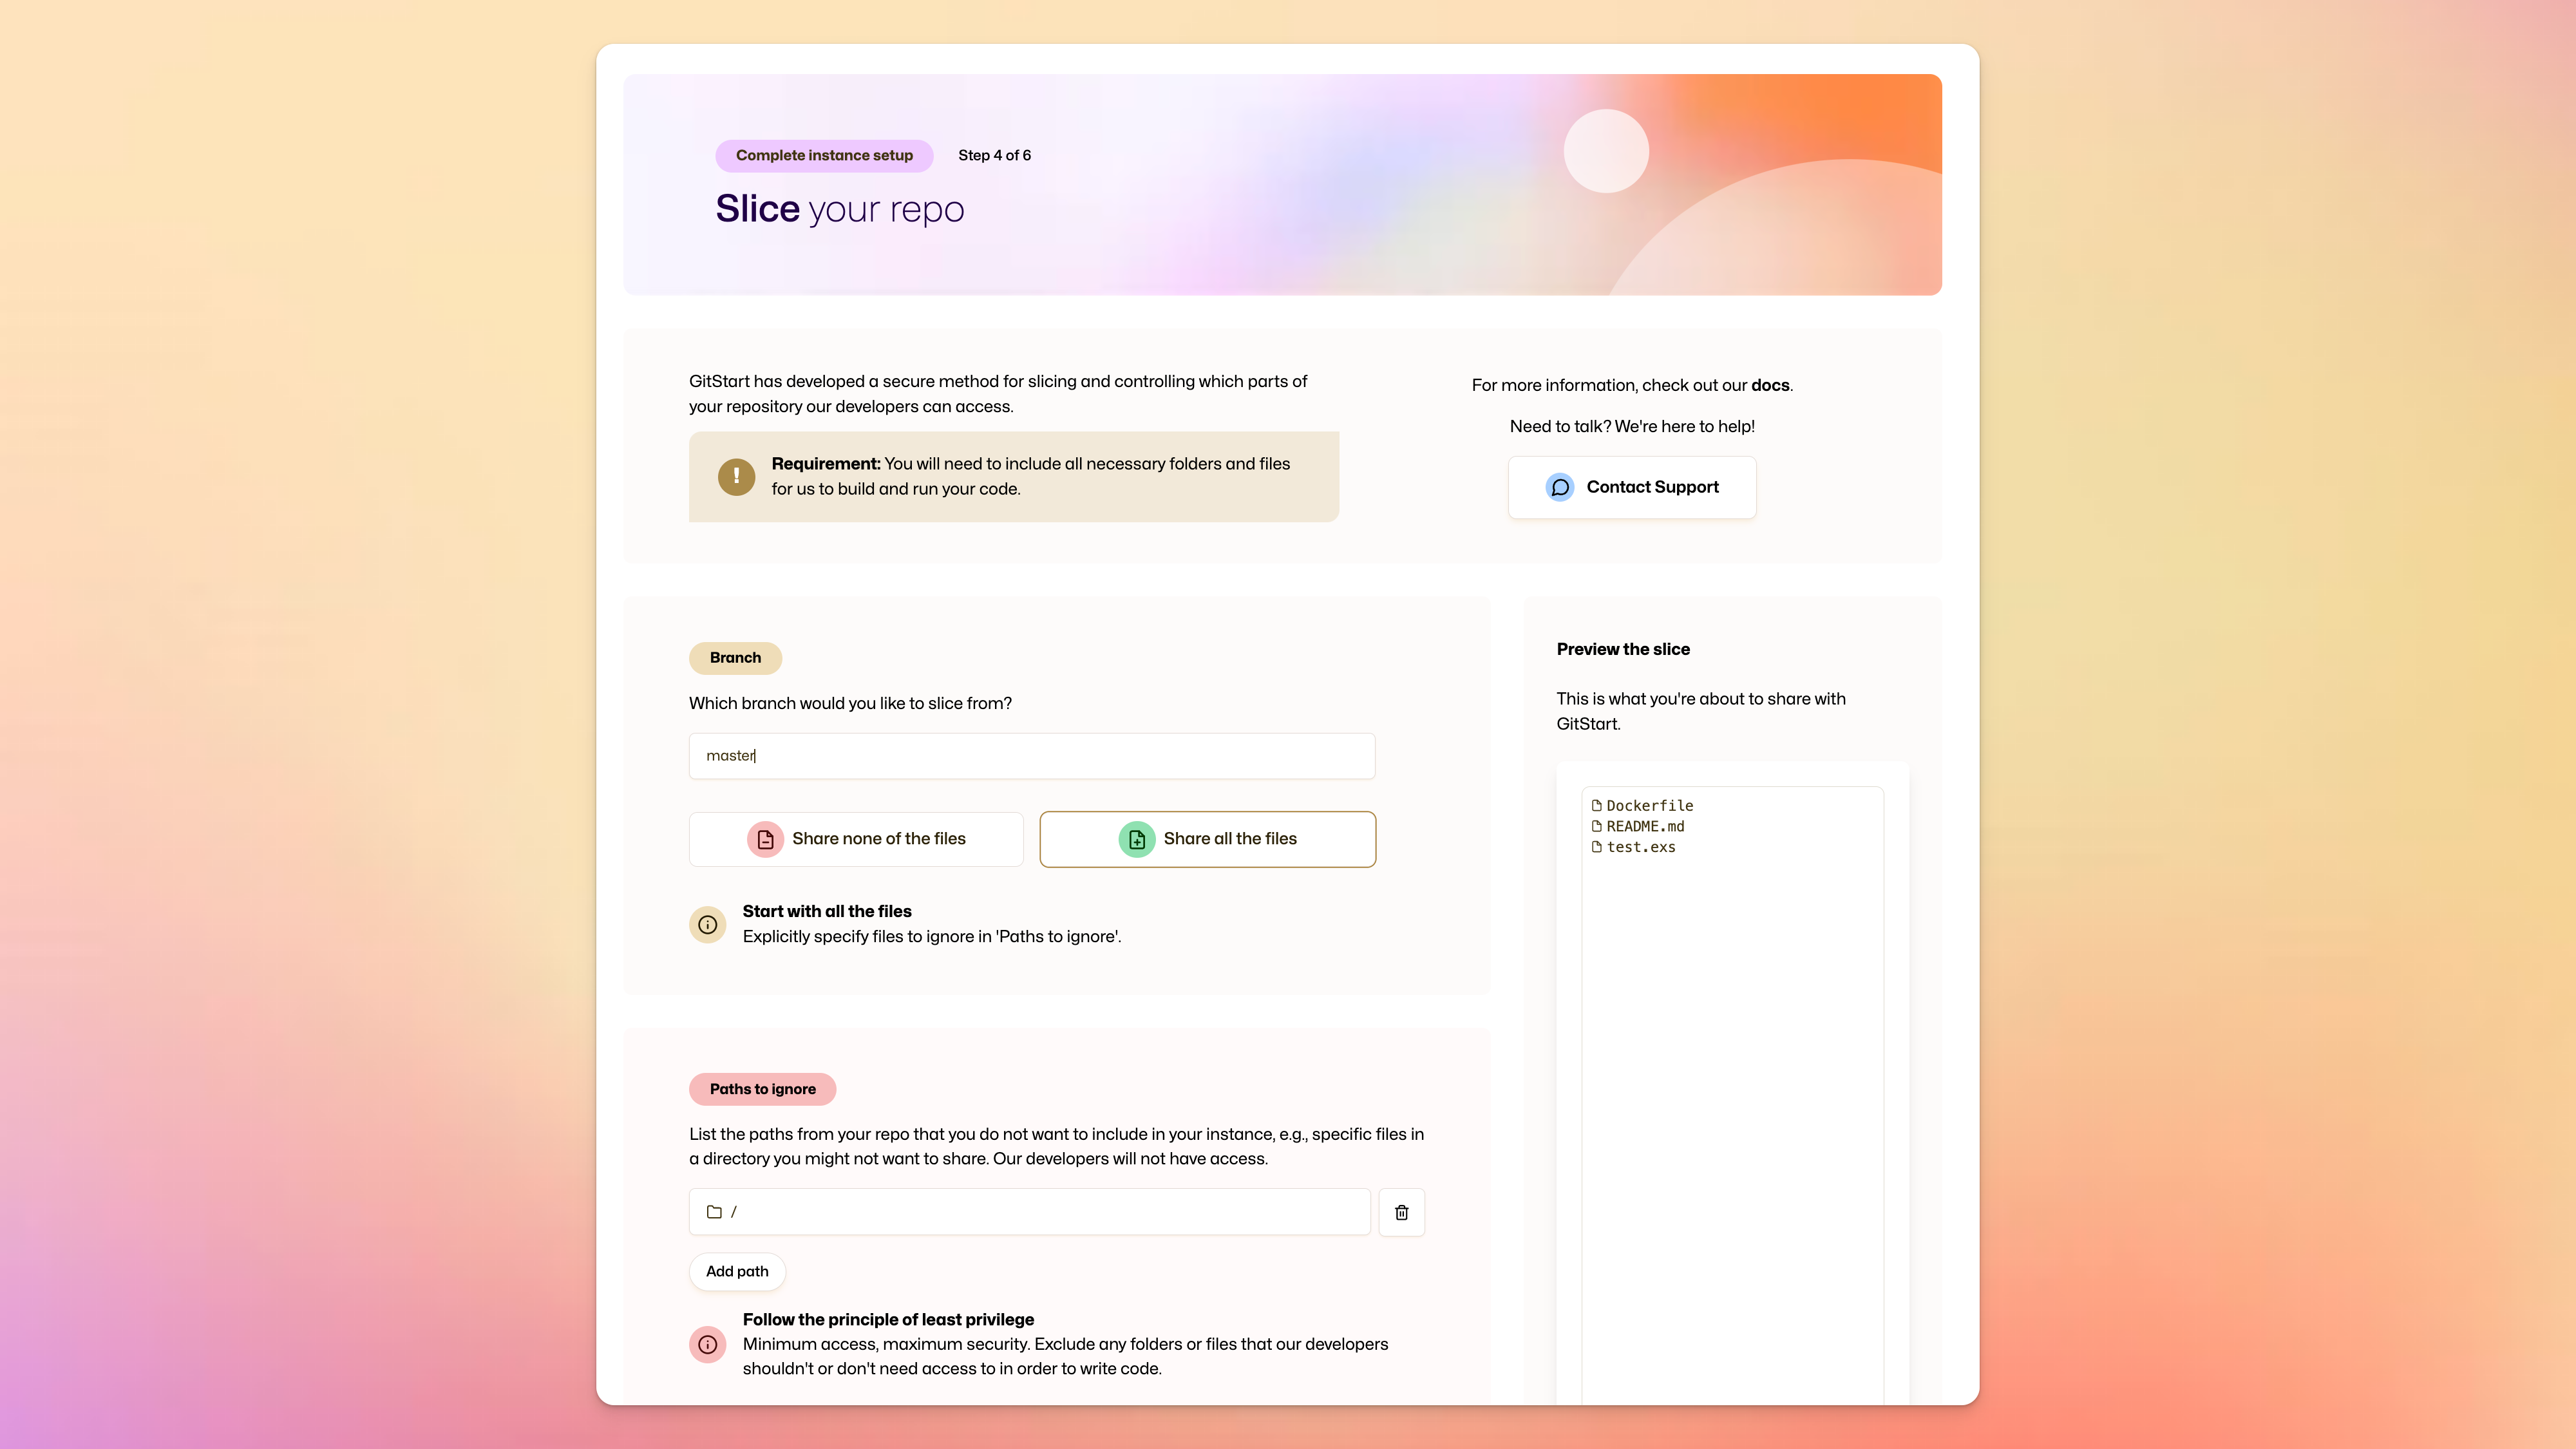
What is a slice?
A slice is a subset of your repository. For security reasons, you control which parts of the repository is shared to our developers to work on it.
Which branch should I specify in the slice configuration?
The branch in the slice configuration is the branch that we slice from, and the base branch when we open pull requests in your repository.
Usually, you can go with the default branch in your repository. Alternatively, you may specify a separate branch that GitStart pulls from and opens pull requests to. Make sure the branch exists in your repository.
What is the difference between “Share none of the files” and “Share all the files”?
This controls by default, whether a file is sliced or not.
If you select “Share none of the files”, by default none of the files are
sliced. You have to specify the “Paths to slice” to include any files. Within
the paths to slice, you can specify exceptions to ignore. For example, you may
slice the whole /src/* folder but add /src/auth/* as an exception. As such,
anything in the /src folder is sliced, except files inside the /src/auth
folder.
If you select “Share all the files”, by default all the files are sliced. You
have to specify the “Paths to ignore” to exclude any files. For example, you may
ignore the whole /assets/* folder but add /assets/favicon/* as an exception.
As such, anything in the /assets folder is not sliced, except files inside the
/assets/favicon folder is sliced.
You can verify what is sliced on the right “Preview the slice” panel.
What package managers are supported?
GitStart currently support npm and yarn. You can input any npm run or
yarn run command. We will run npm install or yarn install before the build
command when verifying your slice. You do not have to add install as part of
the build or run commands.
What does “Use a Dockerfile” do?
Instead of providing node commands to build your slice, GitStart also support building your repository in a docker. In this case, you will have to provide the “Dockerfile Path”, the path to your Dockerfile relative to the root of your repository, and the “Docker Build Context Directory”, the path to the directory to execute the docker build.
The simplest example is having the “Dockerfile Path” as ./Dockerfile and the
“Docker Build Context Directory” as ..
If you have a monorepo, it is possible to have the “Dockerfile Path” as
./packages/backend/Dockerfile and the “Docker Build Context Directory” as
./packages/backend/.
What environment variables are needed?
You will need to provide any environment variables that are needed to build and run your repository. It can be specific keys that are required at build/compile time. You may provide dummy values that don’t break the build. It can also be any environment variables for your testing environment that allow GitStart’s developers to run the slice locally or in CI/CD.